Adjust the coverage settings
The Policy tab in Claim Settings allows you to adjust the coverage settings for the claims in your account. It also allows you to create a list of coverages that claim participants can apply to claims.
You must have Administrator rights to make changes to coverages.
Access
- Click Admin in the left-hand navigation.
- Select Claim Settings.
- Click the Policy tab.
- Click the Coverages section to expand it.

Adjust coverage settings
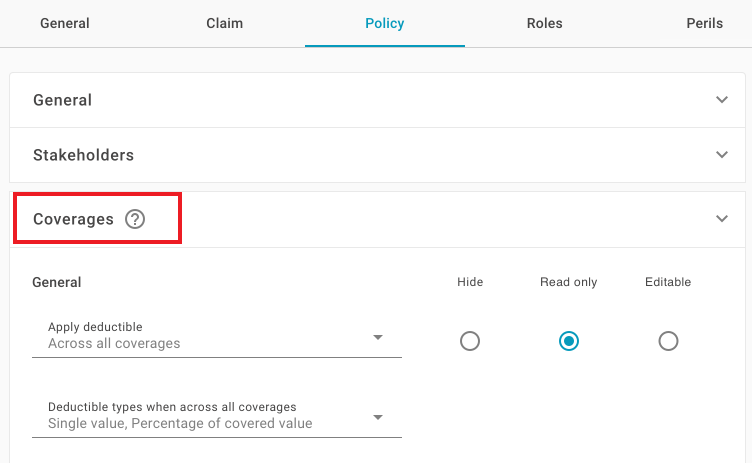
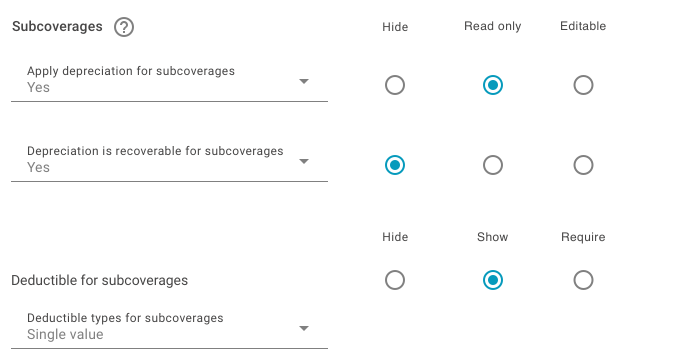
The Coverages section provides a list of fields and menus that relate to the coverages in your claims. From this list, you can select default options from the available menus, and you can determine which fields and menus are hidden, shown, editable, or required in your claims.
- Select an option from each of the menus in the list. Your selection in each menu acts as the default option for all your account's claims.
- Select a radio button option for each field or menu in the list:
Hide: The field or menu doesn't appear in your account's claims. Users won't see it or its default option.
Show: The field or menu appears in your account's claims..
Read only: The menu appears in claims, but users can't change the default option.
Editable: The menu appears in claims, and users can change the default option.
Require: The field or menu appears in claims, and users are required to supply information for it before they submit the claim.

- Click Save at the bottom of the section.
- Click Publish at the bottom of the page to apply your selections to new claims.Claims created before you click Publish won't have your changes.
Add coverages
The Coverages section also allows you to create a list of custom coverages that are available for your account's claims:
- Click Add. This opens the fields and options for the coverage:
Name and translations: Type a name for the coverage. If your account supports multiple languages, type translations for the name in the fields that appear.
Coverage type: Select the category that the coverage falls under.
Apply to: Select whether the coverage applies to Retail Cost Value (RCV), Actual Cost Value (ACV), or Both.
Show ITV: Select this check box to allow users to add an Insurance to Value (ITV) percentage when they apply the coverage.
Show Reserve: Select this check box to allow users to add a reserve amount when they apply the coverage.
Allow custom sublimits and/or additional coverages: Select this check box to allow users to add custom sublimits and additional coverages when they apply the coverage.
Set this coverage as a default coverage: When this check box is selected, the coverage appears in the default list of coverages when users create a claim.
Sublimits: Click Add Sublimit to add a sublimit option for the coverage.
Additional Coverages: Click Add Coverage to add an additional coverage option for the coverage. - Click Save at the bottom of the section. The coverage is added to the list. You can click any of the coverages in the list to edit them.
- Click Publish to apply your selections to new claims.
Claims created before you click Publish won't have your changes.