Vendor management
Vendor Management allows you to keep track of the companies and contractors that you work with. It allows you to add your vendors to an interactive list where you can quickly view and manage their settings. Active vendors in the list are available as menu options when you assign claim roles.
Access
To access Vendor Management, click Admin in the left-hand navigation and select Vendor Management.
Add vendors
- Click
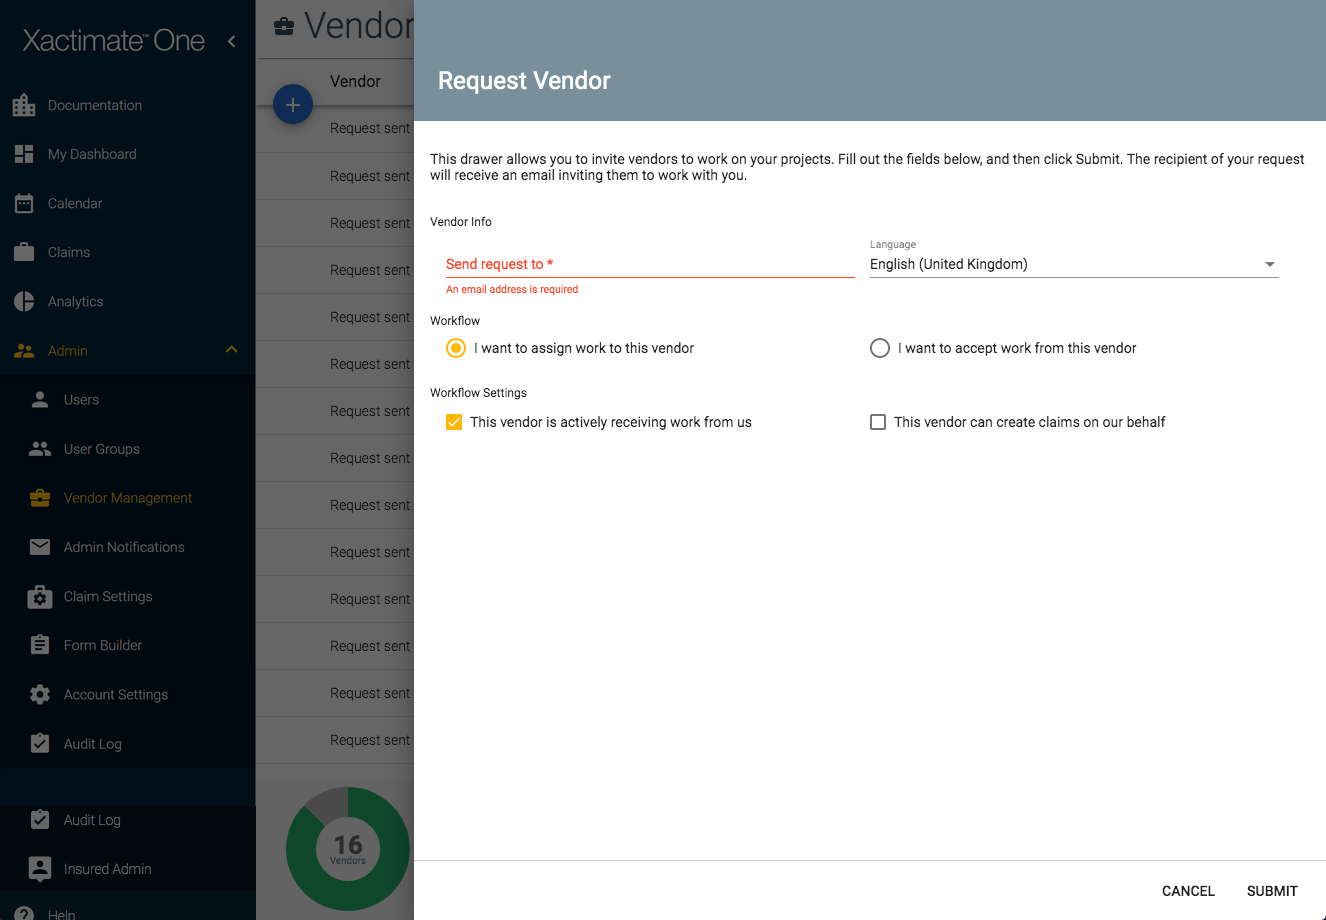
 . The Request Vendor drawer opens.

- Enter the vendor's primary contact email address in the Send request to field.
- Select the vendor's preferred language from the Language menu.
- In the Workflow and Workflow Settings sections, select the options that apply to your arrangement with the vendor.
- Click Submit.
An invitation email is then sent to the vendor, inviting them to work with you via Xactimate One. If they don’t have an Xactimate One account, they can click the link in the email to create one. Once they accept, you can assign claims to them. For more information about assigning claims to vendors, please read The Claim Workflow in Xactimate One.
Edit, deactivate, or delete vendors
To make changes to your vendors in the list, simply click their name and click one of the three icons that appear to the right of it:
- Edit - Edit the contact email address or settings associated with the vendor.
- Activate/Deactivate - Activate or deactivate the vendor in your account. Active vendors appear as options when you assign claim roles.
- Delete - Remove the vendor from your account.
