Claim workflow in Xactimate One claims portal
Xactimate One helps you manage all aspects of a claim, including its creation, settings, participants, and jobs.
Create a claim
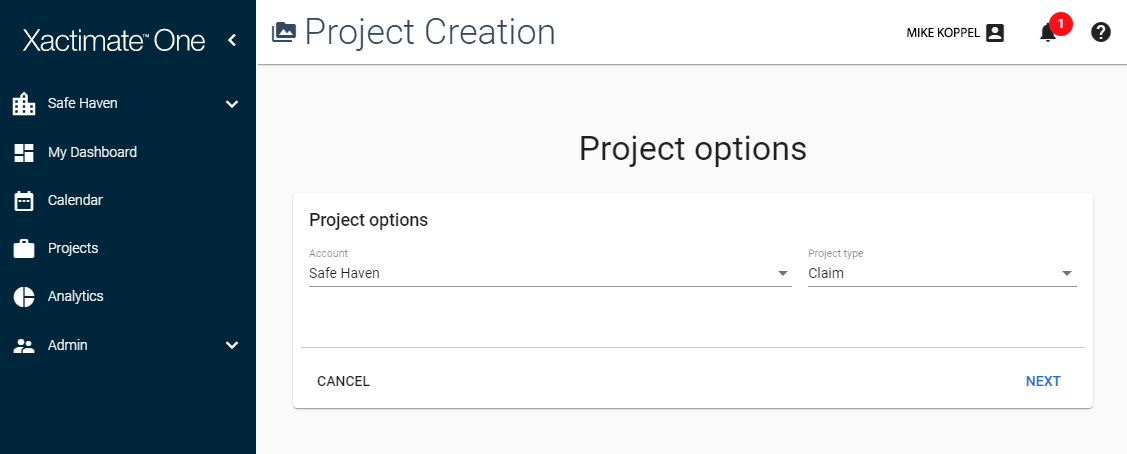
The first step in the claim life cycle is claim creation. You can do this from the Projects page.
- Click Projects in the left-hand navigation.
- Click
 . The Project Options page opens.
 - Select an account from the Account menu.
- Select Claim from the Project Type menu.
- Click Next.

- Enter the policy information in the provided form. The required fields are marked with an asterisk.
- Click
 in the top-right corner.
 - Enter the claim information in the provided form.
- Click
 in the top-right corner. The project will open automatically.
Create a job
Once the claim is created, you can create jobs for it. Jobs are duties assigned to designated participants. Breaking a claim down into multiple jobs allows you to see all the work being done on a claim on one screen. For example, a single claim can have jobs for structural loss, contents loss, mitigation services, and ContentsTrack Packout. You can track the status of each of those jobs on the project’s dashboard.
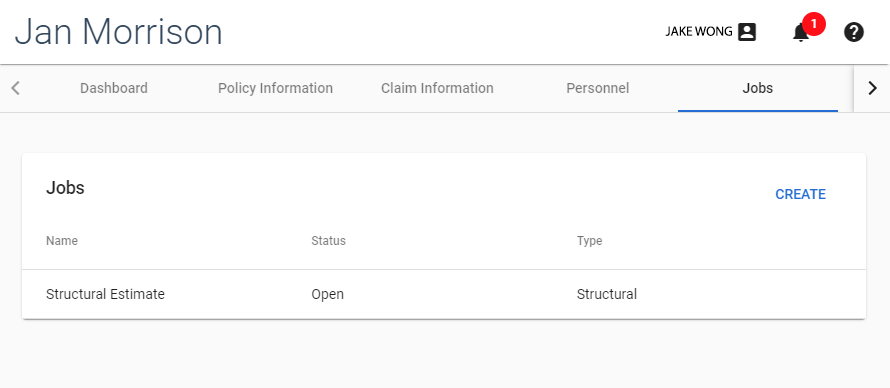
- Open a project and click the Jobs tab.
- Click Create at the top of the jobs list.

- Select a template type from the Template menu.
- Enter a name for the job in the Name menu.
- Click Create in the top-right corner. The job dashboard opens automatically. To go back to the project dashboard, click the Back to project tab.
Assign a job
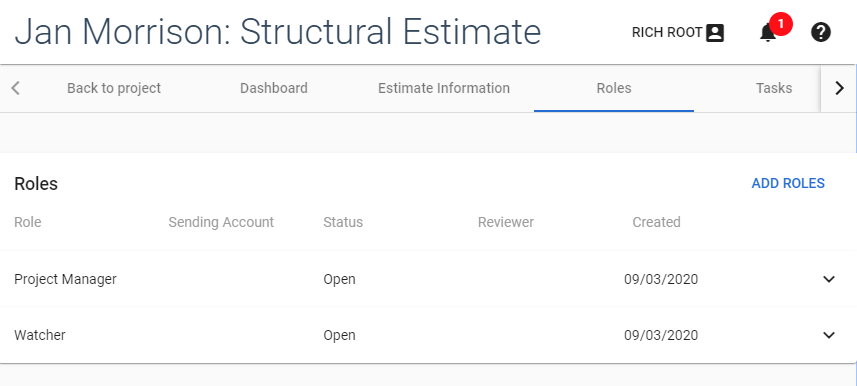
Once a job is created, you can assign a vendor or specific users to the job from the Roles tab.
- Open a job and click the Roles tab.
- Click Add Roles at the top of the Roles list.

- Select either the Staff radio button to create a role for an internal staff user, or the Vendor radio button to create a role for a company, contractor, or independent adjuster.
- Add one or more participants to the role. Begin typing the name of a participant in the User field and select their name when it appears in the results. If the participant is a staff user, you can also indicate if the user is the team lead by clicking the Lead radio button that appears next to their name.
- Select the role that you want the participants to fulfill from the Role menu.Admin users can create new roles and add them to this menu from the Roles tab in Project Settings. For more information, see Create a new user role.
- In the Choose Review Option section, select whether or not a review is required for this role.
- Click Send.
The participant will receive an invitation for this job on their My Dashboard page. They can then either accept or reject the invitation.
Close the job
After a participant completes all tasks associated with a job, either you or the participant can mark a job as completed.
- Open a job associated with a project.
- Click the Roles tab.
- Click the role in the list to expand it's information box.
- Click Complete Role.
Close the claim
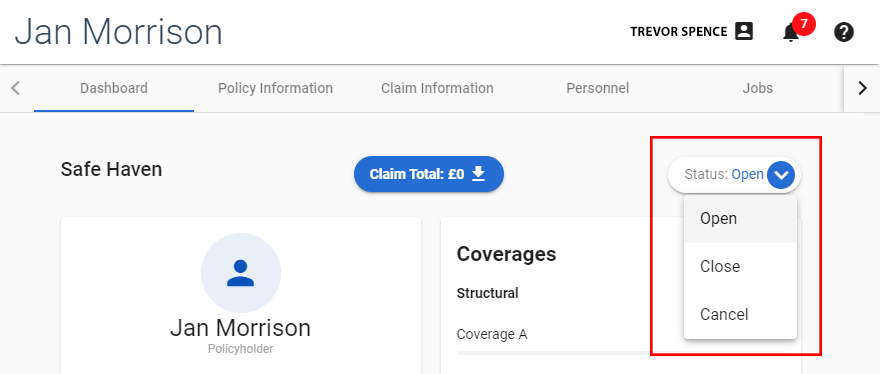
Once you feel a claim and all its jobs are complete, you can close it from the project’s Dashboard tab.
- Open a project and click the Dashboard tab.
- Click the Status menu.

- Select Close. A confirmation window will appear.
- Select a reason from the Closed Reason menu.
- Click Close.