Manage service level agreement deadlines in Xactimate One claims portal
Xactimate One allows account admins to set Service Level Agreement (SLA) deadlines on specific tasks to ensure their employees and vendors are complying with their business objectives in an acceptable time frame. Participants can see which tasks have SLAs associated with them, when they are due, and whether they have met the time requirements of the SLAs.
Set service level agreement deadlines
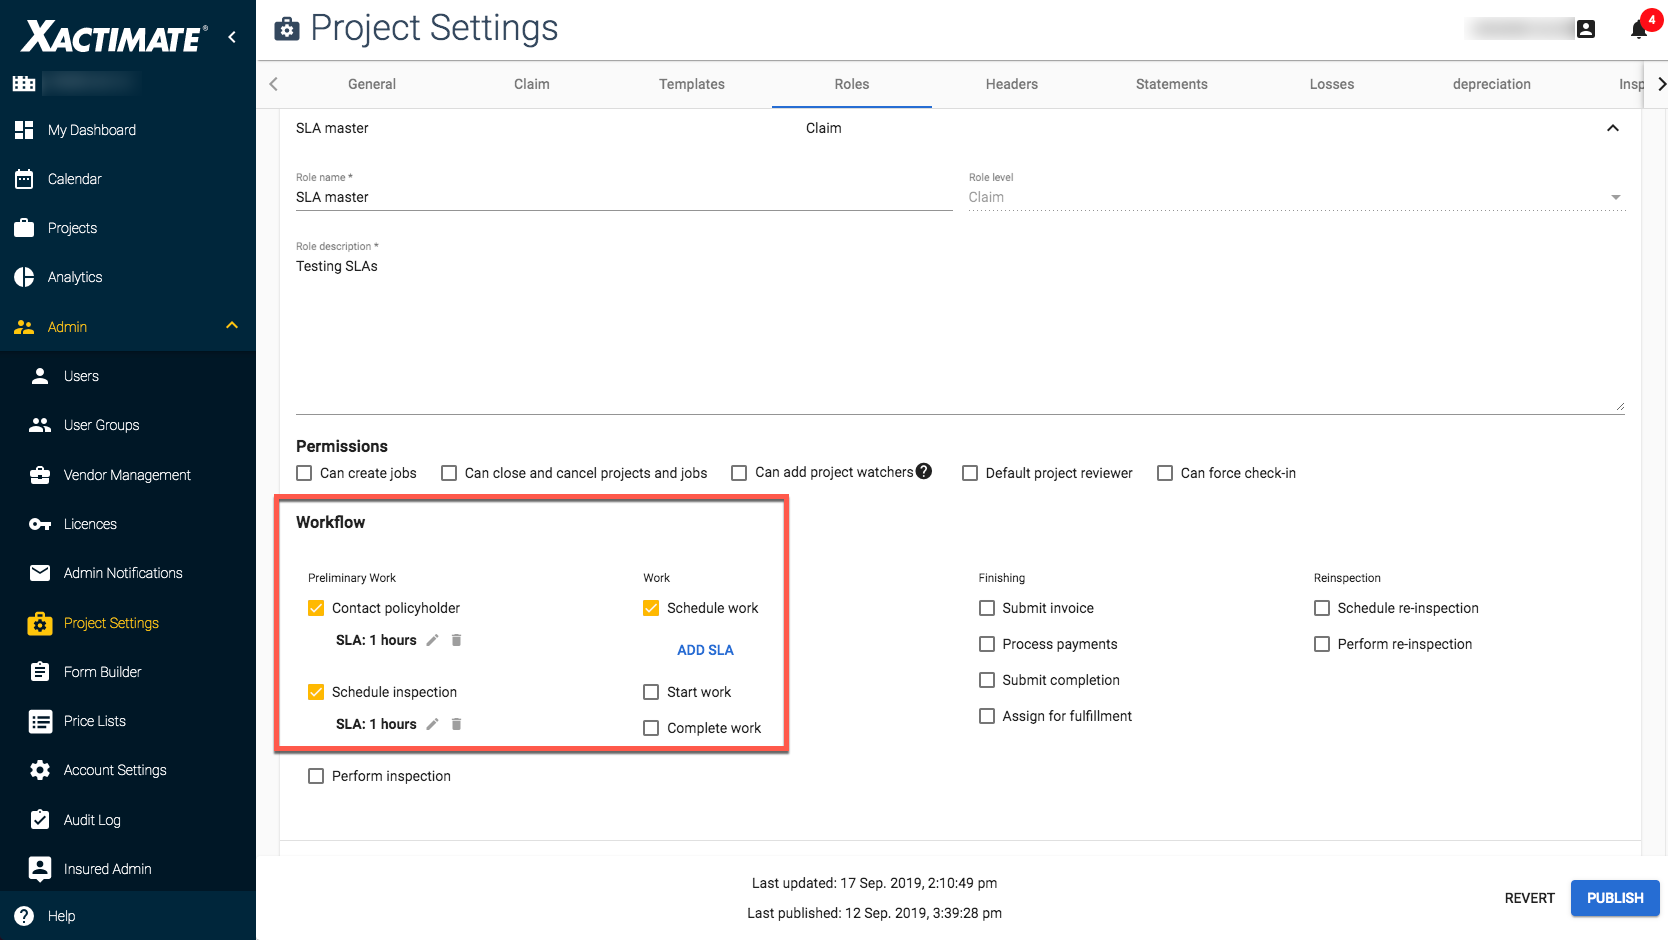
Account admins can set SLA deadlines during the role creation process.
- Click Admin in the left-hand navigation.
- Select Project Settings.
- In the Project Settings page, click the Roles tab.
- Click on a role or create a new role.
- Scroll down to the Workflow section and select the check box for a task. An Add SLA button appears underneath it.

- Click Add SLA. A dialog box appears.
- Select the maximum number of hours that the task should take.
When a user accepts this role in a project, the countdown for the SLA deadline begins.
View SLA time remaining for a task
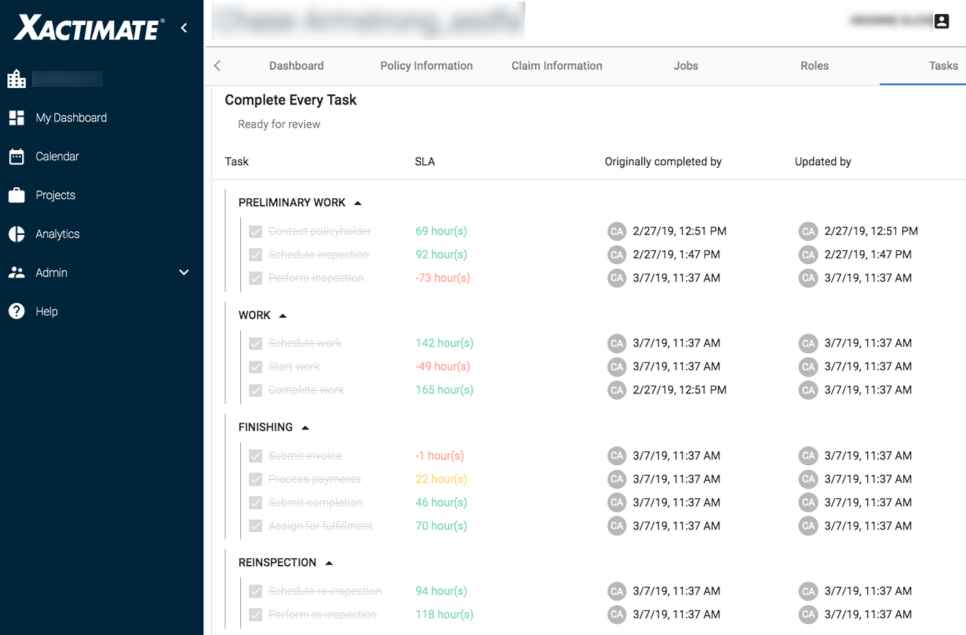
To view the SLA time remaining for a task, open the project and click its Tasks tab. The tab is divided into four columns:
Task
Each of the tasks assigned for the project. When an assignee completes a task, they select the check box for that task. This stops the countdown for the SLA deadline.
SLA
The amount of time remaining in the service level agreement deadline. The times are color-coded green, yellow, and red to gauge time efficiency.
- The time appears green when there is more than 24 hours remaining until the deadline.
- The time appears yellow when there is less than 24 hours remaining until the deadline.
- The time turns red when the deadline has passed.
Originally completed by
A timestamp with the date and time that the task was originally marked complete. You can hover over the initials next to the timestamp to see the name and contact info for the user that marked it complete.
Updated by
A timestamp with the date and time that the task was last updated. You can hover over the initials next to the timestamp to see the name and contact info for the last user to update the task.
